Aside from major construction projects both indoors and outdoors, laser levels can also be used for other less tedious purposes in beautifying a home.

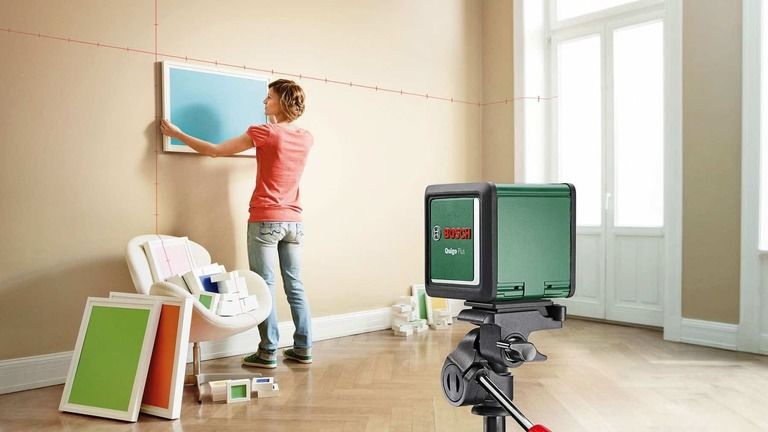
Consider this scenario, you have a group of pictures you want to hang on the wall in a straight line.
You’re wondering how are you going to hold the hammer, nails, frame and the pictures with two hands all at a time in mounting each frame.
If you know how to use a laser level for hanging pictures on walls, then this job will become a piece of cake.
Let's see how!
Advantages of using laser levels for hanging pictures
Since laser levels are mounted on a tripod or on the wall, you can free one hand to hammer the nails for hanging the frames.
Laser levels are also useful in lining up pictures at a certain angle.
The laser can also help in marking the hanger location on the wall when you wish to hang a whole row of pictures with identical sizes.

A simple laser level can also give you the desired precision in aligning frames on the wall just well.
There are also laser level models like this Bosch laser square specifically designed for the purposes of mounting objects on the wall.
Some laser levels may come with combined features of the following: a level, ruler, sliding stops, stud finder and a class II laser.
The laser range could be up to 20 feet, with the ability to pivot in any angle, and snaps into place at every 45 degrees.

The sliding markers containing the vertical and horizontal bubble vials can be locked into place allowing you to mark the locations for studs and holes.
The stud finder is made of a strong magnet which can help you find buried nails and metal studs.
You can find the best laser level for hanging pictures here.
How to use a laser level to hang pictures on walls?
So, how do you make the task of hanging pictures, objects or frames on the wall easier than how it seems?
Here are the steps to guide you in this work:
#1 - First, measure the width of the wall and the width of the furniture you wish to hang.
#2 - Indicate the desired height of the upper portion or the top of the frame.
#3 - Create a mark anywhere within the measured height.
#4 - Turn on the laser level. Align the laser beam across the mark you made horizontally along the wall.
#5 - Adjust the laser until the bubble in the vial rests between the black line. Do this by rotating around the meeting point of the laser and the marked area.
#6 - After leveling the laser and ensuring that it passes through the mark you made, snugly mount the device on the wall with suction cups or putty.
#7 - Measure the distance from the top of the frame to its hanging point.
#8 - Measure the distance from the laser down to the location of the hanging point or mechanism.
#9 - Draw a mark.
#10 - Hammer a nail into the wall where the mark was made.
#11 - Secure the picture frame on the nail and align the top of the frame using the laser.
Tips for Hanging Pictures
When you’re dealing with several columns and rows of pictures to be hung on a wall with a ledge or curved wall, take note of the following measurements to facilitate proper alignment and leveling:
- The center of each picture frame
- The distance from the top of the frame to the hanging mechanism
- For frames with two hanging mechanisms, calculate the distance from the center of the hanging mechanism to the center of the picture.
Best Laser Level For Hanging Pictures

Installing a series of cabinets, drop ceilings and picture frames can be just a breeze with the New PLS 180 Cross Line Laser Level.
The New PLS 180 has a small built presentation with a light weight of 1.7 pounds and operates on 3 AA batteries for up to 35 hours of use.
This PLS laser has the longest length of line and fan angles in the field with a self-leveling range of 6 degrees.
It gives you an accuracy of +/-1/8 inch at 30 feet distance, making it the best laser level for hanging pictures.
This laser is also great for mounting objects on curved walls and walls with no right angles.
The unit comes with its PLS 180 pouch, wall bracket, operating instruction manual and batteries.
Check Price of the New PLS180 Cross Line Laser Level
Conclusion
Hanging pictures or framed objects on the wall can take enormous effort in mounting to ensure proper alignment and to achieve the design you intend to have.
The most common concern in such task is the accuracy in alignment and placement of the hanging mechanisms or hardware to achieve balance.
The job can be accomplished with the help of a laser level saving you great time and effort while at the same time, giving you the hanging precision for this indoor work.

