Using an airless paint sprayer is the quickest way to complete any painting job. Airless spraying is known for achieving professional-quality results and giving a glass-smooth finish on woodwork.
Learning how to use an airless paint sprayer will help you get such results in no time. Whether you're a first-timer or an experienced DIYer, the following insights will help you get the most out of your paint sprayer.
Tools You Need for Airless Paint Spraying
- Drop cloth or plastic sheets
- A good-quality tape
- Bucket of water or paint thinner
- Rags
- A protective mask or respirator
- Painter's pants, apron or gown
- Gloves
- Goggles
- Paint
- Pencil (TIP: Never use ink on surfaces you're painting)
- Airless paint sprayer
- Work light
- Sandpaper and block sander
- Extension poles (when spraying hard-to-reach surfaces)
- Step ladder (essential when painting ceilings and walls)
- Paintbrush and paint rollers (for patchwork)
How to Use an Airless Paint Sprayer
A general step-by-step guide for a smooth and even paint job. Don't forget to refer to your specific paint sprayer user manual. In most cases the following instructions will come handy.
Step 1: Proper Surface Prep Work
Surface prep work is arguably the most important part of a spray painting job. How you do it will determine the quality of the results you'll end up with. Doing a proper surface preparation will reduce overspray and let you handle the task more confidently.
- Start by cleaning the surface. For exterior walls, using a pressure washer and a cleaning solution is advised. In the case of interior walls, use TSP (Trisodium Phosphate). Handle the job thoroughly and allow the surface to dry.
- Do any repair work. After the surface is clean and dry, repair any holes, chips, and cracks. Finish off by sanding the rough areas.
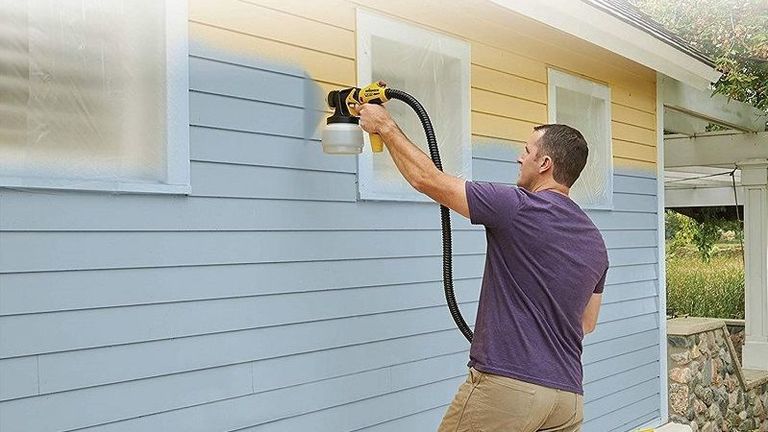
- Cover the surrounding to control overspray. Use drop cloths and plastic sheets to cover your furniture, rugs, and baseboards. Also remember to cover your windows, shutters, and any surrounding area you don't intend to paint.
- Masking gives the best results. When painting small jobs like doors, wall-mounted cabinets, and furniture use tapes to mask off any sections you don't intend to paint. Like hinges, door knobs, and handles. Masking can also offer the best 'covering' solution for interior walls, ceiling, and floor.
- When doing some painting jobs like furniture, cabinets, and doors, use a spray shelter booth. It's the best airless paint spraying station for a DIYer or hobbyist painter. With it, your surrounding will be protected from overspray drift.

- Spray paint shelters and tents are easy to assembly, disassembly, and store. And they can be set up anywhere in minutes, including indoors in your garage! Not to mention their ability to keep bugs and dust a bay as your newly painted job dries flawlessly.
- Take note of the wind direction when painting outdoors. Yes, it’s part of the prep work to prepare yourself on how you will control overspray. Like covering your plants and lawn with plastic to maintain and protect their beauty!
If you're intending to paint a room in the house you're already living in, I recommend you temporarily move your stuff to another room. It is the best way to control overspray.
Don't forget to open the windows for optimum ventilation. And shut the door so that the paint spray cannot drift to the other rooms.
Read more: Step by Step Guide to Preparing Walls For Painting
Step 2: Wear Protective Gear
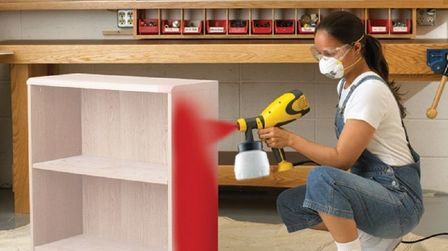
Once your surface is ready, the next step is to protect yourself. Remember, the paint sprayer will be ejecting a paint that has toxic fumes in high-pressure. Some of which will be drifting to the surrounding in form of a mist.
On top of making sure the area is well ventilated, wear protective clothing, respirator/face mask, and goggles. Such clothing should include an apron or gown and gloves.
If you love your hair, be sure to give it a complete cover. Or brace yourself for a few hours in the bathroom as you try to give it a clean wash!
Standing with your back in the direction the wind is blowing from will reduce the amount of spray mist that lands on you.
Step 3: Prepare the Paint
Prepping your paint ensures that you're reducing the chances of clogging your paint sprayer. Not to mention the prevention of paint splatter that can mess up the entire painting job.
Start by giving your paint a thorough stirring. Refer to the paint's user guide for the ideal thinning medium. Some paints come 'ready' for application! In any case, stir the paint and use a strainer to remove any debris.
Step 4: Preparing the Sprayer
The last step of the 'Prep Work' is readying the paint sprayer. With the help of your sprayer's instruction manual connect the spray gun and the hose. The following steps will help you in priming the pump:

- Start by placing the suction tube in the strained paint pail (bucket or tin) and the little prime tube in a waste bucket.
- Turn the spray/prime valve to 'prime'.
- Switch on the pump. Turn the pressure valve up until the pump starts.
- Allow the paint to flow in through the prime tube and immediately move it to the paint pail when it's 'fully' flowing.
- In the paint pail, clip the prime tube to the suction tube and allow the pump to run for a few seconds until you can see no more air bubbles.
- Fill the hose by holding the gun over the waste pail before pulling the trigger. Remember to remove the spray tip and guard and switch the valve setting from 'prime' to spray. When the paint is flowing steadily, let go the trigger.
- Lock the trigger and start the 'pressure relief step' by turning off the power switch. Also, turn the valve setting back to 'prime'.
- Aiming the spray gun against the side of the waste pail, pull the trigger to release the pressure. Finish by engaging the trigger lock.
- Next, install the tip by loosely screwing the guard assembly onto the gun. Make sure that you have aligned the guard perpendicularly to your designed spray pattern.
- Insert the tip until you've engaged the tab. And finally, align and tighten it by rotating it such that the arrow faces forward. Remember to hand-tightly snug the guard assembly.
It's always advisable to check whether the airless paint sprayer is clean. Most of them feature a removable filter in the handle of the gun and another one near the pump. Ensure they are both clean for the best airless paint spraying experience.
Find out: Best DIY Paint Sprayer
Step 5: Do a Test Run
Now that your surface, paint, and paint sprayer are ready, it is time to do a test job. This will also help in adjusting the pressure to suit your desires - for perfect control.
- A test run is best done on a piece of scrap cardboard or plywood. If you can manage to position it in such a way that it imitates the surface you'll be painting, the better!
- To adjust the pressure, turn on the pump and change the valve setting to 'spray'. Start by spraying a strip of paint across the 'test' surface and check the spray pattern.
- If the pattern has tails, it means the pressure is low and you should consider turning it up.
- If the pressure is too much you will experience an excessive overspray. You should consider reducing it as it can lead to premature tip wear.
- Do another re-test and keep adjusting the pressure until the paint is evenly distributed across the fan pattern.
If your spray pattern is uneven, even at maximum pressure, consider switching to a tip with a smaller hole. Moreover, round spray patterns, rather than narrow, mean that the tip is already worn and you should get a replacement.
Step 6: Spray the Surface
Once you're satisfied with the spray pattern, it’s time to move to the surface you intend to paint. The following airless paint spraying techniques will help you improve the overall results of the paint job.

- Use a scrap piece of cardboard for test jobs to find the technique that works best for the painting job at hand.
- Start by squeezing the trigger just before you reach the edge of the surface you're painting.
- Move the sprayer quickly across the surface. Keeping it parallel and perpendicular to the surface.
- When the sprayer reaches the opposite end of the surface, gently release the trigger.
- When you make each of the next passes with the sprayer, overlap about half of the strip you previously painted.
- If you're working on large surfaces like walls, work in one-foot-width spaces. As you paint, remember to overlap to avoid patches of uneven painting.
- When you get to corners, sprayer quicker and vertically to avoid overspray.
- Always step back and check your work after doing a few sections. In case of missed or light spots, do the patchwork with a roller or a brush.
- Like the traditional painting with paint rollers and brushes, your surface needs some room to dry.
- Leaving the space/room well-ventilated will allows for a proper 'cleanup' of the paint mist/vapor.
For the best results, always maintain a distance of about 25 to 30 centimeters from the tip of the sprayer to the surface you're painting.
Step 7: Cleaning the Sprayer
Immediately after you're done with the painting job, clean the sprayer thoroughly. Most sprayers will come with a flush feature that allows you to easily clean it by connecting to a garden hose.
Remember, airless paint sprayers are different. The rights steps for proper cleaning will depend on the model and the manufacturer's directions. It's advisable to follow these instructions to enhance the sprayer's lifespan.
How to Use a Handheld Airless Paint Sprayer
As a DIY homeowner, a corded or cordless electric paint sprayer might the best equipment for your home improvement painting jobs. These handheld paint sprayers are budget-friendly, durable, and easy to use even for a beginner into paint spraying.

Actually, they are designed for small home renovation projects. Like repainting your walls, ceilings, kitchen cabinets, furniture, fence, and garage doors. This part of the guide will help you learn how to use an electric paint sprayer like a pro.
NOTE: The surface prep work when using an electric paint sprayer is the same as that of the standard airless paint sprayer. That's as discussed in "Step 1" above. You should also remember to wear protective gear, refer to "Step 2" above.
#1 - Set-Up the Electric Handheld Paint Sprayer
Depending on whether you're using a corded or cordless handheld paint sprayer, get it out of the 'storage' and prepare it for the job. All manufacturers include a sprayer-specific user manual that helps you in the set-up process. For some, all you need will be to retrieve it from the storage and get to the next step.
Part of the sprayer preparation will involve putting the motor and paint reservoir (with the gun) together. Mostly, it is a matter of engaging the two and locking them in place.
NOTE: If you're using a cordless paint sprayer, you might need to consider charging/recharging the battery. In the case of corded models, ensure the electric cord can reach to the closest socket. While give you 'enough cord length' to navigate around the painting area.
#2 - Prepare Your Paint
Unless the manufacturer has specified otherwise, it's always advisable to thin the paint by 5% to 15%. It helps the handheld electric sprayer paint better.
Always remember to use water for water-based paints and a thinner for oil-based paints. Straining your paint will help in preventing splatter and clogging.
NOTE: Using too thick paint on the sprayer will result in spitting instead of spray. It's a sign that the sprayer is struggling to 'propel' the paint. Such a scenario might be a wake-up call to thin the paint even further.
#3 - Add Paint in the Paint Reservoir
Now that your paint is ready, it's time to add it to the reservoir. Simply remove the container from the paint sprayer, add the strained painted, and put it back in place.
Remember to "prime" the sprayer if your model has that feature. It'll be just a matter of putting the knob/level to 'prime' and pulling the trigger, and then switching it back to 'spray'.
#4 - Do a Test Job
In "Step 5" above, I shared in detail how you should go about test jobs. Just as a recap, use a scrap piece of plywood or cardboard to test the spray pattern.
Make sure it's spraying in a narrow pattern, not a heavy overspray. You should make adjustments until you get the right spray pattern for a thin coat application.
During the test job, learn to adjust the spray pattern. You can do a few test jobs to test different spray patterns for different jobs. For electric paint sprayers, adjusting the pressure, paint pattern, and the tip is just done with a simple 'twist' or 'turn'.
Please consult the user manual, and remember to learn how to adjust the motor power.
NOTE: When using an electric paint sprayer, don't tilt it too much. It's good to practice this on the test job!
Their paint suction tubes are rigid, and tilting when the paint level gets down would lead to irregular paint sucking. A situation that might lead to shooting big blobs that mess your painting job. Keep an eye on the paint level when painting in angles (upwards and downwards).
#5 - Paint the Surface

If you're painting large surfaces like ceiling boards and walls, work in one-foot widths strips. And then overlap them by about 30 to 50%.
It's always advisable to paint two to three thin coats rather than a single heavy overspray. Multiple thin coats will ensure the paint sticks better with even coverage.
Remember, to move your entire body as you paint. Not just your arm. This ensures that you don't end up painting in arcs. Nevertheless, keep the distance between the sprayer tip and surface at around 25 to 30 cm.
TIP: If you're using a corded handheld electric paint sprayer, you can get a longer extension cord. It will help is easing the painting process by allowing for easier navigation. The normal electrical extension cords will still work!
#6 - Clean Immediately
Just after you're done with the painting job, clean the electric paint sprayer. Your user manual will come with specific steps on how to clean your handheld paint sprayer model.
In most cases, all you need is to start by cleaning the paint reservoir with water or paint solvent. And then finish by "spraying' the liquid until the spray system is 'clear'.
NOTE: Unclogging an electric airless paint sprayer is pretty easy. Most come with a 'reversible-tip" design where you turn around the tip, pull the trigger, and turn it back. That's, spraying when the tip is reversed clears the clogging!
Learning and practicing all the steps of using an airless paint sprayer will help you achieve pro-quality painting job result in no time. I always recommend doing a few test jobs with your airless paint sprayer model on different scrap surfaces. It’s the best method to spray paint like a professional.

