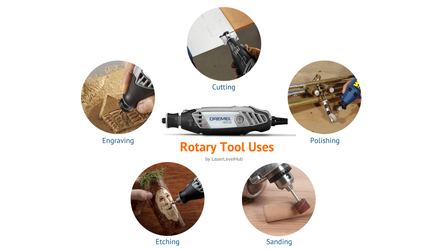
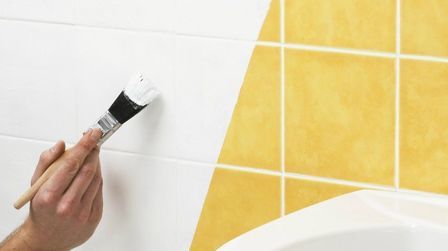
This is the second article in our series "30 Easy DIY Projects That You Can Do with a Rotary Tool".
In the previous article, we have introduced 15 projects that take advantages of a rotary tool and its rotary cutting accessories, sanding and engraving accessories.
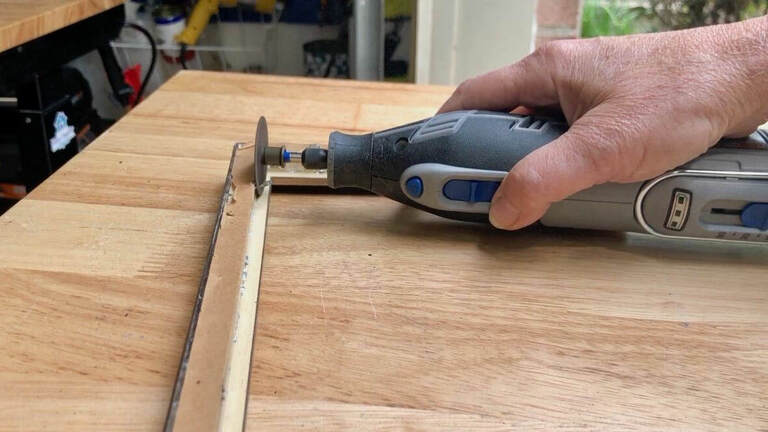
Here in this article, we'll go through 15 more projects on how to use a rotary tool that surely amaze you with the versatility of a rotary tool and make your life easily.
Now, let's start!
16 - Remove Grout With a Rotary Tool
Grout removal is one of the handier uses of a rotary tool.
I specifically bought my rotary tool for a grout removal exercise when remodeling my bathroom floor. Whereas I use it for tens of other projects, I have used it severally for grout removal around my home.
It works faster and perfectly compared to other alternatives!
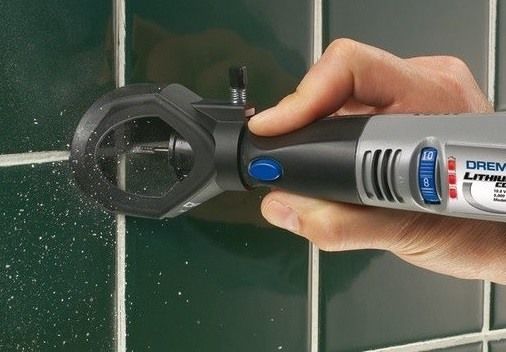
Supplies Needed:
- Carbide grout removal bit
- You may need a grout removal guide.
Note: You will need to wear safety goggles and gloves. Also, protect your ears in case your tool produces noise.
How to Remove Grout with a Rotary Tool
Step 1
- Fix the grout removal bit and attachment on the tool.
- Ensure that the height of the bit is perfectly adjusted to suit the area where you will be removing the grout.
Step 2
- In case of an electric tool, plug it into the main supply. For a cordless tool, ensure that it has sufficient charge.
- Power on the tool and put it to a medium speed.
- Start on one end of the tile and slowly move to the other end.
Tip:
Using the grout removal attachment will ensure that you are careful not to "touch" the tile in the process.
However, you should remove the attachment when working on corners.
Step 3
- In corners, tilt the tool at an angle, and let its speed work the process and not your strength.
- Watch out for any metallic tile spaces. Avoiding them will help you keep the bit out of damage.
Tip:
Adjust the guide a greater depth to remove a deeper depth of grout. Be sure not to dig deeper on your first touch to avoid damaging the bit.
To find the best power tools for grout removal, check this article.
17 - How to Use Rotary Tool To Sharpen Tools Like Knives
The rotary tool's grinding attachments can be used to sharpen knives, scissors, lawn mowers, and chainsaws among other equipment.
I have personally used it to sharpen my hiking pocket knife. All you need is to clean the equipment with a cloth and grind its cutting edge until its sharp.
Supplies Needed:
- A grinding stone accessory
- A polishing wheel
- Mandrel
- A vise
Note:
When sharpening tools like lawn mowers and chainsaws, ensure that the spark plug is removed and the gas tank is empty.
How to Sharpen Tools with a Rotary Tool
Step 1
- Put on your eye protection goggles and safety gloves
Step 2
- In case you are sharpening a knife or other similar equipment, insert the rotary tool into the vise.
- Firmly tighten it such that the knife is secure while the blade is exposed.
Tip: You can secure the vice on the workbench for a perfect grip.
Step 3
- Attach the mandrel and a grinding attachment on your rotary tool.
- Power on the tool and test whether it is rotating properly.
Step 4
- Start sharpening on one side at a 12.5-degree angle, before repeating on the other side.
- Sharpen from the base of the handle to the tip
- Allow the blade to cool, before moving to the other side.
- You may sharpen only one side at 24-degree angle.
Step 5
- Switch to the polishing attachments and polish your equipment as you desire.
Tip: You can practice sharpening an old blade before you try it on your expensive equipment.
18 - Cleaning Surfaces Before Painting
Prepping surfaces for painting or repainting can be a daunting task.
The tiny wire brushes attachment lets you do the job faster and conveniently.
I have used them when cleaning equipment handles, knobs, and cabinet surfaces. They will work both on wooden and metallic surfaces.
Supplies Needed:
- A tiny wire brush - for wooden surfaces
- A brass brush - for small metallic surfaces
- Abrasive buff - for larger surfaces
- Eye protection gear
- A vise
Note:
Rotary tool's cleaning attachments come in different shapes, styles, and sizes.
A simple Google search for the ideal brush for the surface you intend to clean will help you do things right!
Steps on How to Prep Surfaces for Painting
Step 1
- Wear your eye protection gear
- In case of metallic surfaces, I recommend you put on your safety gloves
Step 2
- Attach smaller equipment like golf clubs or hammer on the vise and make sure they are secured tightly
- In case of furniture, you should consider doing the cleaning outside the house.
Step 3
- Attach the brush attachment on your tool and power it on.
- Bring it to a medium speed, 15,000 RPM, and start cleaning the surface using the edge of the brush.
- You should start from one side to the other, paying attention not to miss any detail.
Tip:
Let the speed of the brush do the cleaning and not your strength. Applying pressure will not only weaken the brush but also result in a poorly done job.
19 - Removing Rust from Metallic Surfaces
Gardening tools are prone to rust. So, does other home tools and equipment like secateurs, pliers, hammers and screwdrivers.
You might take care of their metallic surfaces regularly, but they may still rust.
Supplies Needed:
- Steel Brush
- Abrasive Brush
- A vise
Note: Wear your eye protection gear and gloves. I recommend that you do the cleaning exercise outside your house.
Steps on How to Remove Rust from Metallic Surfaces
- Secure smaller tools like screwdrivers and pliers on the vise.
- Attach the steel brush on your rotary tool and power it on.
- Slowly work on your tool by letting the brush clean the surface. Avoid the temptation of using your strength in the process.
- Use the abrasive brush for larger surfaces.
- You should maintain the tool at a medium speed, about 15,000 to 20,000 RPM.
Tip:
I have used the rotary tool to clean rust and stains in my kitchen sink. It was a nice alternative to steel wool and scrubbing brush.
20 - Polishing Silver and Jewelry
There are rotary tool's accessories that have been specifically designed for cleaning and polishing jewelry.
I will admit that I have never used a rotary tool on jewelry, but I have stabled upon legit videos and reviews of people who have done it before.
With the right accessory, you can use the tool to clean crannies and nooks on your lovely jewelry and silver.
Rotary tools are particularly ideal when used on intricate pieces of jewelry.
Supplies Needed:
- A Flex-shaft attachment
- Jewelry buffing wheels/pads accessories
- A jewelry buffing compound - it should be "fine" and intended for jewelry
- A jewelry cleaning solution
Note:
The polishing wheels come in different colors, with the black being the most aggressive while the pink/red the finest.
Steps on How to Polish Jewelry and Silver
Step 1
Wear safety glasses and gloves. Your regular sunglasses will suffice.
Step 2
- Attach the buffing pad attachment on your rotary tool.
- Depending on the depth of scratches, you should go for an aggressive or fine pad.
- Some buffing wheels come "ready" to use on your silver pieces or jewelry, you should consult the buyer's guide before using them.
Step 3
- Power on your tool to the lowest speed and extract the buffing compound.
- Avoid applying to much pressure, since it can soften and splatter.
- Let the compound coat on the pad sparingly.
Step 4
- Hold your jewelry firmly and apply some moderate pressure as you clean and polish its surface with the tool. Low to medium speed is ideal for this exercise.
- The process may leave some compound on your piece of jewelry, but you shouldn't worry about it.
- Workaround your jewelry until you have touched every spot that you need to polish.
CAUTION: Don't buff on diamonds pieces!
Step 5
- Stop and pause amid polishing to allow the tool to cool as you regain focus.
- You can use this time to inspect whether you missed some spots when polishing.
Step 6
- After you are done polishing, power off your tool and put the jewelry through jewelry cleaning solution.
- You can use soluble detergent and soak it for some time. You can swish it around to speed up the process.
Step 7
- Remove your jewelry from the solution and use a soft cloth to dry it. Wow, you now have your shiny piece!
Tip:
I would not recommend using the tool to clean necklaces and similar chains. Once the chain gets wrapped on the spinning attachment by mistake, you should consider it lost!
For more detailed guide on how to polish with a rotary tool, check out these videos.
21 - Cutting Thin Metal Sheets
You may need to cut thin metal sheets when building a chicken coop or counter-tops.
Whereas there are heavy scissors that have been specially designed for the job, using a rotary tool will help you accomplish the task easily.
The tool will work even in hard-to-reach areas. I have personally used it when cutting iron sheets.
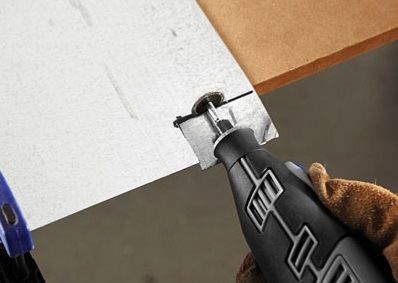
Supplies Needed:
- A carbide-metal cutting wheel.
Note: You can use oil on the metal surface to reduce heat.
Steps on How to Cut Thin Metal Sheets
Step 1
- Wear your safety gear - eye protection and gloves. The process involves the production of a lot of sparks.
Step 2
- Measure and mark the area/line that you need to cut
- Depending on the size of the metal sheet, you might need to use a workbench.
Step 3
- Attach the carbide metal cutting wheel to your rotary tool
- Power on your rotary tool to a medium speed
- Start cutting along the line slowly, by letting the wheel do the job and not your strength.
Tip: Start with a faint cut along the line and then repeat with the actual cutting.
Read more: Best Rotary Tool Reviews
22 - Fixing Stripped Screws
Have you ever experienced a situation where you are trying to open something but there is one screw that can't just come out?
I believe you have! Maybe it was during a home-remodeling exercise and you were trying to remove cabinet doors or ventilation outlets.
Most likely, you will get the screw's head stripped in the process. A rotary tool will help you fix the problem!
Supplies Needed:
- A diamond cutting disc
Steps on How to Fix Stripped Screws
- Attach the metal cutting disc on your rotary tool and power it on to the lowest speed.
- Cut a slot on the head of the messed-up screw.
- You should ensure that you are cutting a thin slot by avoiding multiple cuts on the screws head.
- Power off the rotary tool and use a bladed screwdriver to remove the screw.
Tip: Go as deep as you can, when cutting, without messing other parts of the components around the screw.
23 - Drilling Holes on Surfaces
You may not be in a position to buy a drilling machine. Your rotary tool will work as a perfect alternative in such a scenario.
I have managed to drill holes in wood, hard plastics, and ceramic tiles with my rotary tool.
All you need is the right drilling bit and you are good to go.

Supplies Needed:
- Diamond drill bits - if you intend to drill on hard materials like stone, pottery, ceramic, glass, and shell.
- Tungsten carbide or carbide drill bits - if you intend to drill through hard metallic surfaces.
- High-Speed Steel (HSS) drill bits - if you intend to drill through plastics, wood, or soft metals.
Note: Wear safety gear when using drilling bits with a rotary tool.
Steps on How to Drill Holes with a Rotary Tool
Step 1
- Prepare the surface that you intend to drill. If you are drilling through small metals or pieces of woods, you can secure them with a vise.
- When drilling through soft materials with the HSS drill bit, ensure that there are no hard materials beneath them. You can use a vise and drill through them horizontally.
Step 2
- Attach your desired drilling bit on your rotary tool and power it on. Depending on your tool, you may need to use a wrench in the process.
Step 3
- Put it on the highest speed and start drilling through the surface until you make it through to the other side of the material.
- Let the bit do the drilling and not your strength.
See also:12 DIY Projects You Can Do with an Oscillating Multi Tool
24 - Polishing Old Watches
You might be having some old watches in your house that caught scratches years ago.
Well, your rotary tool may just be the only thing that you need to bring them into shape.
I tried this on an old metallic watch strap and I must admit the results were amazing! Only that I just replaced it with a leather strap a few months ago.
Supplies Needed:
- Polishing wheels - various sizes and textures
- Polishing compound.
Note: You will need to wear eye protection gear and gloves. You can use sunglasses in place of goggles.
Steps on How to Polish Old Watches
Step 1
- Attach the polishing wheel on your rotary tool. Depending on your tool you may need to use a wrench.
Step 2
- Power it on to the lowest speed and coat the polishing wheel with the compound.
- Different compounds are meant for different materials. You should consult your buyer's manual before using the compound. You only need a small amount of the compound.
Step 3
- Hold your watch with one hand and the tool on the other hand.
- Start polishing the watch slowly, paying attention not to touch the glass parts. Focus on the scratched areas.
- You may need to switch between polishing wheels in the process.
Step 4
- Finalize the process by using a soft cloth on your tool. There are soft cloth attachments for rotary tools.
Tip: In case you have a flex-shaft attachment, you should consider using it for a better flexibility.
25 - Shaping Acrylic Nails
Ladies adore glamorous nails, while men cherish women who understand how to maintain their beautiful bodies.
Acrylic nails are among the ways through which ladies use to embrace their external beauty.
When equipped with the right accessory, your rotary tool will help you keep your acrylic nails in shape.
Supplies Needed:
- Super flex shaft nail drill
- Or nail bits accessories.
Note: Avoid the temptation of using a rotary tool on your "natural" nails.
How to Use Rotary Tool To Shape Acrylic Nails
- Attach the flex-shaft nail drill or nail bits on your rotary tool. You may need to use wrench depending on your tool.
- Power it on to a medium speed and start working or your acrylic nails.
- Depending on how you want to shape them, you should move from lower to medium speeds
- Take regular breaks to let the tool cool down as you regain focus.
Tip: Always remember to switch off your tool when it is not in use.
26 - Shape Your Horses' Hoofs
Are you looking to shape your horse's feet in the weekend?
Well, you may no longer need your hoof knife. While the knife is specially designed for shaping horse's feet, a rotary tool will give it a much better finish.
Supplies Needed:
- An abrasive grinding disc.
Note: You will need to wear goggles, gloves, and an overall for the exercise.
Steps on How to Shape Your Horses Hoofs
Step 1
- Attach the grinding disc on your rotary tool and test whether it is spinning perfectly.
Step 2
- Restrain your horse in a secure place and raise the foot that you intend to shape with one hand.
- Bend the foot upwards, such that the hoof faces outwards.
Step 3
- Power on your rotary tool to a medium speed and start shaping the hoof.
- You may need to clean the hoof with a rug before using the tool.
- Trim and shape the hoof to your desired results before moving to the next hoof.
Tip: You can consider stopping and pausing to regain focus amid the exercise.
27 - Fixing a Leaking or Corroded Water Heater Hose
You can repair the leaking or corroded sections of crimped-on heater hoses at a fraction of the price that you would use to replace the whole assembly. The process is simple and affordable.
Supplies Needed:
- A cut-off wheel attachment
- Worm-drive clamps
- Reshaping coil
- Heater Hose
Note: Wear safety gear - goggles and gloves.
Steps on How to Replace a Leaking Hose
- Attach the cut-off wheel attachment on your rotary.
- Shut off the water supply at the main valve and drain off any water in the heater.
- Power on your tool and cut through the crimp ring slowly and precisely.
- Make to slices on either side of the hose.
- Slip on the new hose and finalize the process by securing it with the worm-drive hose clamps.
Tip:
In case you are unable to get the proper molded hose, slide a reshaping coil over a straight section of the hose and bend it at the appropriate angle.
The coil helps in maintaining the angle, thus preventing the hose from collapsing at that bend.
28 - Removing Old Paint
You can easily remove old paint and heavy corrosion on various materials with rotary tools' sanding accessories.
All you need is to identify the right accessory for the intended surface and wear protective gear.
I used my rotary tool, a while ago to remove old paint from windows before repainting.
Supplies Needed:
- Sanding Bands
- Flap wheels
- Abrasive buffs - for fine sanding applications.
Note: You can use other abrasive sanding sleeves for the job
How to Use Rotary Tool to Remove Old Paint
- Wear safety gear before starting the exercise. You will need goggles, gloves, and a nose guard.
- Attach the sanding bands on your rotary tool and power it on.
- Bring it to above 20,000 to 30,000 RPM and start sanding on the painted surface. The process requires high speeds, unlike other sanding exercises.
- You only need to make soft touches. The sanding bands and flap wheels will easily remove the paint.
Tip: When using the abrasive buffs, set the speed to about 15,000 RPM.
29 - Carving Sandstone and River Stones
You might have a few river stones that you have kept as mementos of your previous hiking sprees. As you age, you may end up forgetting the dates when you collected them or the specific locations where you hiked.
Carving such details on them will help you perfectly remember what happened on such days. A rotary tool will help you get this done.
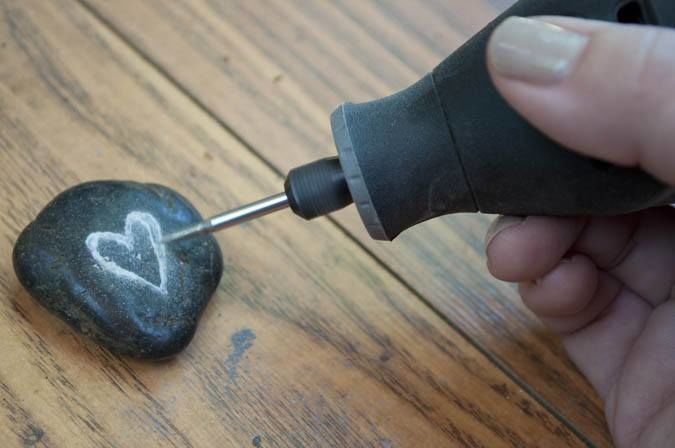
Supplies Needed:
- Diamond carving bits.
Note: The process involves the production of a huge amount of dust. You will need to wear goggles, gloves, and nose guard.
How to Use Rotary Tool To Carve Stones
Step 1
- Attach the diamond carving bit on your rotary tool. You might need a wrench in the process depending on your tool.
Step 2
- Write down what you intend to carve on the stone and approximate how it will fit on it.
Step 3
- Power on your tool and start carving slowly and precisely.
- Starting with a thin bit to make an outline before going for a thicker bit will offer you with the best results.
- You should consider pausing and cleaning the surface with a rag for a better precision.
Tip: I recommend trying this on other stones before committing it to your mementos.
30 - Cutting Glass and Mirrors
At times, you may need to cut glass when repairing your home. Maybe you have ordered an over-sized piece or you have a larger piece at your disposal and would like to try it out before spending.
Using a rotary tool will help you cut the glass easily and precisely.
Supplies Needed:
- Diamond cutting wheel.
- Abrasive buffs
- Tape
Note: You should wear gloves, goggles, and a nose guard. The exercises involve production of a huge amount of dust. Breathing it isn't that great!
How to Use Rotary Tool to Cut Glass
- Attach the diamond cutting wheel on your rotary tool
- Use a tape to trace the cutting path. It works better compared to marking the path with a pen.
- Power on your rotary tool to about 20,000 RPM and start cutting.
- Start by making a nick in the glass and proceed by making it bigger until you are done cutting the entire glass or mirror.
- Remove the tape and sand the edges with an abrasive buff.
Tip: You can use this method to recycle wine bottles into flower pots.
Conclusion
Now that you know the many ingenious projects that you can accomplish with your rotary tool, the next step is to write down a list of these uses.
Depending on your expertise and the accessories at your disposal, start with what you find readily doable.
Schedule the list of projects and the targeted results. Try them out, you don't want to do the trials when the problem has already knocked on your door!
This way, you will not only have a feeling of achievement but you will also learn a lot in the process.


