Buying new kitchen cabinets is usually expensive considering they are sometimes constructed using cheap and low-quality materials such as particle board.
Therefore, spray painting them is usually the best alternative to buying new cabinets especially in instances where you love everything about the cabinet except the color.
Today we are talking about how to paint kitchen cabinets using a sprayer.
Choosing The Right Paint For Your Cabinets
Giving your cabinets a fresh coat of paint is the easiest and the most cost-effective way to update your kitchen style.
A tired old oak kitchen cabinet can be renewed by just painting it in a soft gray color. Once the paint has dried, you can replace the knobs with new ones that complement the new color.
However, before you begin painting your cabinets, you have to decide whether to use water-based latex paint and primer or oil-based paint.
Latex Paint vs Oil-based Paint: Which One to Use?
In case your cabinet was previously painted using water-based latex paint, you will be forced to stick with that.
NOTE: Latex can be used over oil, but oil will not adhere well when used over latex.
In other words, latex is the safest bet when you are not sure of the type of old paint used on your cabinet. However, both type of paints can work well over a clear finish.
Both paints have pros and cons. As much as the latex paint has been improved over the years, many professional painters still prefer oil-based paints to latex when producing smooth and durable surfaces.
We have to agree that durability for kitchen surfaces is a factor that must be considered during painting since kitchen cabinets get used a lot.
On the downside, oil-based paints require that you clean your painting tools with mineral spirit because they tend to produce fumes that you may not like inside your kitchen.
Today, most latex paints are a lot easier to manage because they are virtually odorless and cleaning only requires soap and water.
How Much Gloss Do You Want?
Once you’ve decided whether to use latex or oil-based paint, you have to determine the degree of gloss to be used.
As for kitchen cabinets, it is always advisable that you go with a semi-gloss or a really shiny, gloss. Using such types of gloss makes cleaning the cabinet easier than when the surface is painted with flat or eggshell.
Masking The Kitchen Before Painting
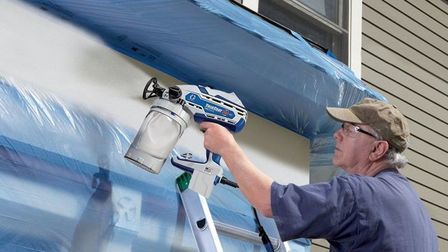
Painting is always the best solution when modernizing older cabinets that are well built. The disadvantage of spraying kitchen cabinets is that it produces over-spray which might be messy if you don’t mask everything carefully.
A handful of painters have argued that the total amount of time required to mask and spray your kitchen cabinet is the same as the time required for rolling and brushing, which is not the case.
I can take no more than one day while masking a kitchen for spraying. Once the masking is complete, I can complete spraying the primer and paint at the rate of ten minutes per coat.
I can bet doing this process with a roller can take you about one full day for each coat. So, I can argue using a sprayer can save you a couple of days of work. I can as well give you some few masking tips that will help you save a lot of time during the process.
Masking Tips For Painting
You only need the right masking tools and supplies for this process, the first masking tools you need is the 3M hand masker, a masking film and a painter’s tape.
I have been using the 3M masking tool for all my paint prep. It allows you to stick your masking tape and plastic to the surface at the same time saving you the time of doing this separately. A masker is an important tool, especially when handling bigger projects.
Use red rosin paper instead of drop cloth
Instead of using drop cloths, cover the kitchen floor with a red rosin paper because drop cloths are known to be blown by the pressure of the spray gun.
About three-foot rolls of rosin papers are enough for the project, they are available in practically any home improvement store.
You have to ensure that you tape the paper to the floor just right up to the bottom of the base of the cabinets.
Wrap electric appliances and lights
Wrap electric appliances with plastic and tape them around the edges to prevent overspray from blowing underneath.
You have to be a little more careful when it comes to the dishwasher. Carefully open the dishwasher and run the tape along the sides of the door.
In case the cabinet is close to the ceiling, cover the low hanging lights with plastic or a masking paper to block the overspray.
Normally, masking the cabinet box openings would have been time-consuming. But with the masker described above, the process has been made easier.
Necessary Tools & Materials
- HVLP (high volume, low pressure) paint sprayer
- Cordless drill
- Screwdriver with Phillips' head
- Zip-Loc type bags
- Painter's tape
- Sheet plastic
- Canvas drop cloth
- Trisodium phosphate (TSP)
- Wood putty
- Random orbital sander, such as a Black & Decker Mouse
- Tack cloth
- Paint primer– either white or tinted to match your color coat
- Latex enamel paint
- Fan
- 2-inch tapered paintbrush
- Painter’s bucket
- #120 grit sandpaper
- Tack cloth
- Vacuum
- Sanding block
- Paint
- Screwdriver
- Primer
How to Paint Kitchen Cabinets With a Sprayer
Step 1: Prep the Surface
Clean all the CabinetsThe cabinet should be thoroughly cleaned to remove dirt and grime that have accumulated over the years otherwise, the paint and primer will not adhere properly.
Remove and label any hardware component in the cabinet accordingly before taking it to the garage or workshop.
Do not forget to stick a tape into the hinge holes to keep unwanted paint out.
Protect Countertop With Rosin Paper
The last thing you want when painting your kitchen cabinet is paint all over your countertops. Rosin or a builder’s paper can offer an easy way to protect your countertop, floor, and backsplash.
A common roll measures about 35 feet wide by 140 feet long of which you can expect plenty of the paper to be left as soon as the project is complete.
Remove Doors, Drawer Fronts and Hardware
As much as it is tempting to leave the doors in place for painting, I would advise that you remove them if you want a much neater and a more professional-looking job. I am sure you don’t want to see paint slopped over drawer interior or the hinges and hardware covered with paint.
Most drawer fronts on modern cabinets can be removed from the drawer by simply backing out a couple of screws.
Well, in that case, remove the hinges and knobs before labeling them underneath the hinge. Just make sure not to forget to stick a piece of on the number. This step ensures there is easy installation once the job is complete.
You might as well remove the entire drawer, but I would recommend that you only remove the drawer fronts. This can block the space around each drawer by inserting a tape to ensure the over-spray does not blow in.
Step 2: Sand and Prime
It is possible to paint a cabinet without sanding with certain paints and finishes. However, it is wise to just scuff up the surface before priming especially when you are not a pro in painting.
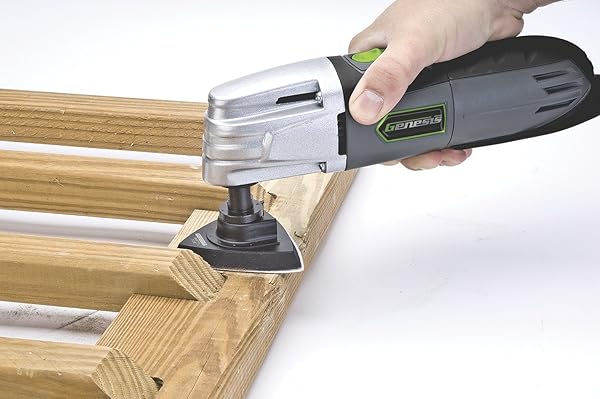
The reason why you should sand cabinets before you begin painting is to give the new paint a good surface to grip. If the cabinet is made of bare wood, you don’t need to sand. For quick sanding, you can use an oscillating tool to create a smooth surface before painting.
Usually, a 320-grit sandpaper is ideal for this project, but if the cabinet has a factory finish then you will require a sanding sponge or 120-grit sandpaper.
As for rough surfaces probably due to poor varnishing or previous paintwork, a 100-grit paper will be useful when getting rid of bumps before using a 120-grit paper to remove the sanding marks.
For the first coat, choose a fast-drying primer if you want to speed up the project. But you have to make sure that the paint is compatible with the primer.
Pro Tip: Oiled-based paint is still the option for priming because they dry slowly and levels well. Also, some oil-based primers (Benjamin Moore Fresh Start Enamel Underbody) sand easily producing a perfect finish with fewer brush marks.
Double-Check for Defects After Priming
The first step after sanding, priming and getting rid of dust from cabinets is to fill the unwanted holes with wood filler.
For this project, I will choose the MH Ready Patch which is an oil-based spackling compound. This is not only because it sticks well, but also dries firmly for a durable repair.
Step 3: Spray Paint the Cabinets
Choose a paint that works best with cabinets and woodworks. Remember to prepare the materials according to the manufacturer's direction if you want to end up with high-quality work.
NOTE: glossier surfaces usually highlight imperfections, while thinner paint will provide you with a finer finish. Do not consider using a satin sheen or an eggshell unless you are a meticulous painter.
In case your paint does not level out after applying due to extra thickness, consider mixing it with a conditioner like Floetrol.
Strain your Paint
A lot of painters avoid going to this extreme. Major pro painting consultants argue that even fresh paint will have small lumps that might interfere with the painting process.
At least filter your paint or any leftover paint using a paper cone which is available in almost every paint department.
Support Doors on Standoffs
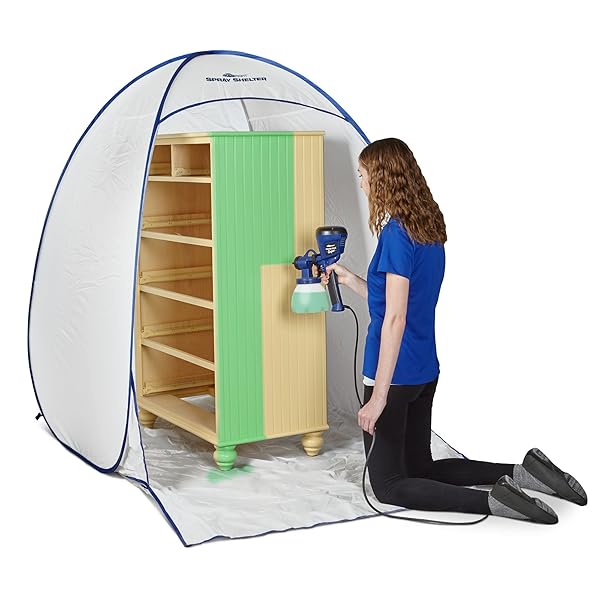
You can support the doors while you paint using a plastic painter’s pyramids. You can as well use the Medium Spray Shelter Paint Booth (tent-like structure) which is a safe area for spray paint and protects the surrounding environment from overspray drift.
You can use standoffs to paint both sides of the door at the same time, that is, if you don’t mind the visible dimples at the back of the door.
So, how do you start painting a kitchen cabinet?
It is important that you leave the edges unpainted and focus on painting the back first. This ensures that you have a spot to place your fingers when turning the door.
Once you have flipped the door and painted both sides you can then focus on painting the edges and let it dry.
Consider Spray-Painting the Doors
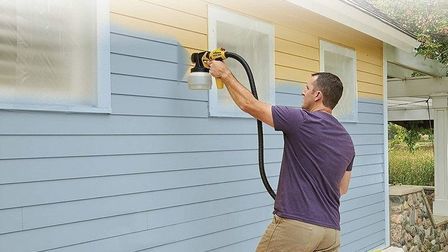
You can achieve a factory-finish quality with a little practice and a good paint sprayer for cabinets. Other than the pro-quality airless sprayer, you can get great results with (HVLP) high-volume, low-pressure sprayer.
Do not forget to thin the paint based on the instructions. It is advisable that you apply several thin coats instead of just one thick one.
Spray your cabinet with your first color coat immediately after the prime coat has solidly dried. Patience is key at this stage. Go lightly and avoid rushing the spray paint as it may cause splattering or dripping.
Drawer fronts and cabinet doors should take about sixty minutes when sprayed for a medium sized kitchen. The process should be repeated leaving four hours between each coat.
Spray Painting the Cabinet Boxes
There is a different approach when dealing with cabinet boxes. The sprayer has to be moved to the kitchen to give the boxes a light spray coating.
Since you are most likely dealing with vertical surfaces, you have to be extra careful because they can create drips. Add another coating after four hours.
Install the Hardware and Cabinets
Reinstall the hardware components of the kitchen cabinet once everything has dried and looks good. This task will be much easier if you followed the instructions and labeled everything as instructed.
Once everything is back in place, replace the pulls handles and doorknobs. You can then hang your cabinets and enjoy your hard work.
More Spray Painting Tips
Learning how to spray is not hard. It is a skill that requires time to practice and get used to. I would advise that you practice using cardboard before spraying your precious cabinets.
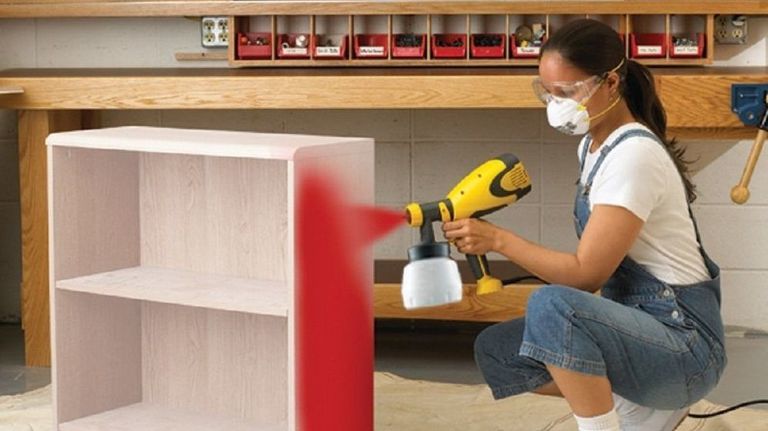
If you choose to spray without a spray booth remember to wear a respirator or set a couple of box fans to filter the dust particles away from the spray site.
Here are some more tips to remember while spraying:
- Spray 10 to 12-inches away from the surface
- Sweep your arm back and forth across the panel
- Use a block of wood to elevate the doors
- Spray the backs first to practice
- Don’t use your wrist to spray
- Overlap the paint by 50 percent until you reach the bottom
- Allow the paint to dry overnight
Read more airless paint spraying tricks here.
Summary
Latex paint remains to be the most preferred paint when dealing with cabinets. This is because it is easy to clean with a brush, it does not “yellow” over time and it has quick drying time ideal for your second or third coat.
It is advisable that you avoid matte paint on kitchen cabinets as well as an eggshell finish if you want a durable and a wipeable surface.
The cost of painting a kitchen cabinet will always vary depending on the type of materials used. When you decide to use a paint sprayer, there are certain costs that you will have to incur.
Overall, purchasing a paint sprayer is more of an investment as you can use it for future projects as well.
As much as painting your kitchen cabinets yourself can seem to be a big task to undertake, it is actually a great way of saving time and money. The task should not be cumbersome once you have taken the necessary preparation and have the right equipment for the job.
You will be surprised at how amazing your kitchen cabinet looks when you choose to paint them with a sprayer.




 Bruce Rivers